
Garage Ceiling Racks: The Real-World Guide to Planning, Installing, and Living with Ceiling Storage

There's a moment most homeowners reach at some point — usually after the third time they've tripped over a bin of holiday decorations or squeezed past a stack of camping gear to reach the car — when they look up at the empty space near the ceiling and think: that has to be useful for something.
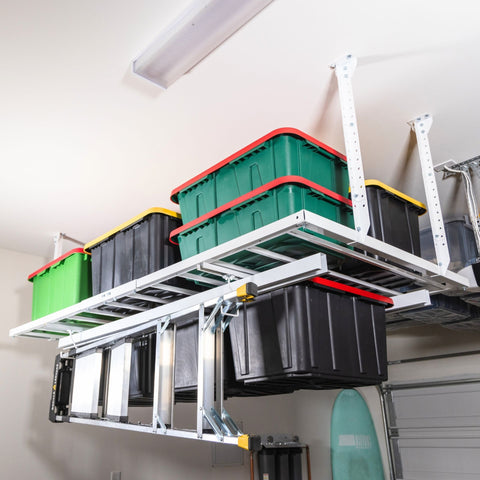
It is. Garage ceiling racks are one of the most effective storage upgrades you can make to a home, precisely because they turn that overlooked dead zone directly above your head into organized, accessible storage. Done right, a ceiling rack system can hold hundreds of pounds of seasonal gear, free up your entire floor, and make the garage feel like a completely different space.
Done carelessly, though, ceiling storage can be frustrating — hard to access, poorly organized, and ultimately ignored. The difference between a ceiling rack system you use every day and one you regret installing is mostly in the planning. This guide walks you through everything that matters: how to plan your layout, what to look for in a rack, how installation actually goes, and how to keep the system working well long-term.
Why Garage Ceiling Organization Works So Well
Walls and floors get all the attention in garage organization, but the ceiling is arguably the most valuable real estate in the whole space. Here's why it consistently outperforms other storage options for certain categories of gear.
It uses space nothing else can
Wall-mounted shelves, cabinets, and pegboards all compete with each other — and with cars, workbenches, and tools — for the same vertical wall surface. The ceiling doesn't compete with anything. Even a heavily organized garage usually has most of its ceiling space completely empty. Garage ceiling racks capture that space and put it to work without displacing anything that's already there.
It keeps seasonal items truly out of the way
The items best suited for ceiling storage are ones you use infrequently but can't get rid of: holiday decorations, off-season sports equipment, camping gear, luggage, rooftop carriers, pool floats. These things need to live somewhere, but they don't need to be accessible daily. Storing them on a garage ceiling rack keeps them safely out of the way for months at a time without cluttering any of the spaces you use every day.

It protects your floor — which protects your car
Floor-level storage in a garage has a way of expanding until there's no room to park. Bins get stacked, boxes accumulate, and slowly the car ends up staying outside. Moving that gear to ceiling storage in the garage doesn't just organize the space — it actively defends your parking area from creeping clutter.

It scales with your needs
A single garage ceiling storage rack in one zone of your garage is a perfectly good starting point. You can add more racks in other zones as your storage needs grow, and combine platform racks with sliding bin systems, retractable lifts, or wall shelving to create a fully layered organization system at whatever pace makes sense.
Planning Your Garage Ceiling Organization: Start Here Before You Buy Anything
The biggest mistakes people make with ceiling storage happen before installation — during the planning phase, or lack of one. A few hours of thoughtful planning will save a lot of frustration later.
Measure your ceiling height — precisely
This is the single most important number in the whole project. You need to know your actual ceiling height (floor to joist or finished ceiling surface) in the zones where you want to install racks. Don't estimate. Measure in multiple spots, because garage floors are not always level and ceiling heights can vary more than you'd expect.
Why does it matter so much? Because the clearance between the bottom of the rack (or whatever is stored on it) and the roof of your tallest vehicle determines whether the system is actually usable. A common rule of thumb is to maintain at least 12 inches of clearance between the bottom of stored items and the top of the car — more is always better, and less starts to feel risky for taller vehicles, SUVs, and trucks.
Map out your ceiling obstructions
Before marking a single drill point, identify everything that's already up there: the garage door opener rail, the door tracks running along both sides, any HVAC ducts, light fixtures, or sprinkler heads. Draw a rough sketch of the ceiling with these features marked. Your rack placement has to work around all of them.
The garage door opener rail is usually the most significant constraint — it runs down the center of the ceiling from the door to the back wall and takes up a meaningful amount of the prime storage zone directly above the parked car. Most homeowners end up positioning ceiling racks to either side of the opener rail or behind it toward the back of the garage.
Identify your joist layout
Garage ceiling racks must be anchored into ceiling joists — the structural framing members above the drywall or sheathing. Use a stud finder to locate them and mark their positions. Note the spacing (typically 16 or 24 inches on center) and their direction. Your rack mounting hardware needs to align with these joists, so joist layout directly affects where you can place the rack.
Think about what you're storing — and how often
Ceiling storage in a garage works best when it's organized by access frequency. Items you touch once a year go as far back and as high as possible — they just need to be out of the way. Items you access monthly or more often should be positioned where they're easiest to retrieve, ideally with a system that doesn't require a ladder to access them.
This is also the time to realistically assess what you plan to store. Weight it if you can, or make conservative estimates. Don't buy a 400 lb capacity rack and plan to load it with 380 lbs — leave yourself headroom.
Types of Garage Ceiling Racks: Which One Fits Your Setup?
Not all ceiling racks are the same, and the right type depends heavily on how you plan to use the system.
Fixed Platform Ceiling Racks
A fixed platform rack is a steel frame mounted directly to the ceiling joists at a set height. It doesn't move. You store items on it and retrieve them with a ladder or step stool. These are the most straightforward, most affordable, and highest-capacity option available.
Ceiling SAM's heavy-duty fixed racks are built specifically for this purpose. The 4x4 Ceiling Storage Rack handles up to 400 lbs and fits well in smaller garages or targeted storage zones. The 4x6 Ceiling Storage Rack offers more platform space for households with more gear to store. And the 4x8 Heavy-Duty Ceiling Storage Rack — rated to 1,000 lbs — is the workhorse option for garages that need maximum hanging storage capacity. All are made in the USA, built from heavy-gauge steel, and designed to last.
Fixed Racks with Sliding Bin Systems
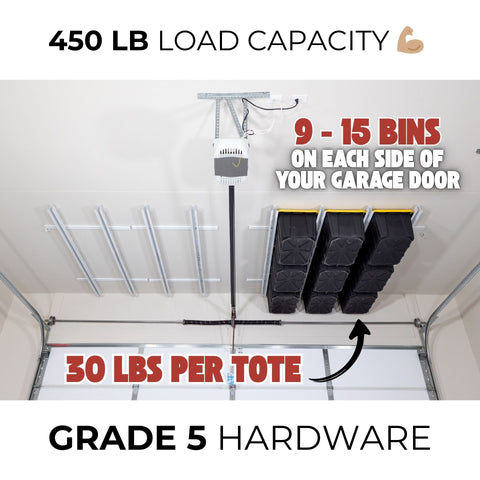
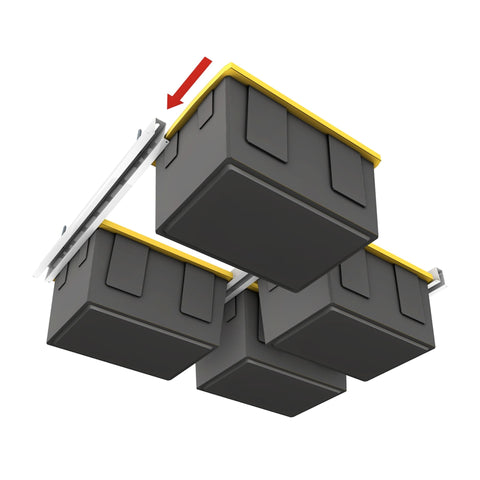
A fixed ceiling rack becomes significantly more functional when you add a sliding bin system underneath it. Rather than stacking totes on top of the rack and climbing a ladder to sort through them, a sliding system lets individual bins pull out horizontally — like an overhead drawer — so you can access exactly what you need without disturbing everything else.
The Bin Slide mounts to an existing ceiling rack and holds standard storage bins on smooth-gliding rails. The Tote Slide and Tote Slide Pro accommodate larger totes with even more capacity. For anyone who wants the convenience of ceiling storage without constantly needing a ladder to find things, this combination of fixed rack plus sliding bin system is one of the most practical setups available.
Retractable Ceiling Racks (Storage Lifts)
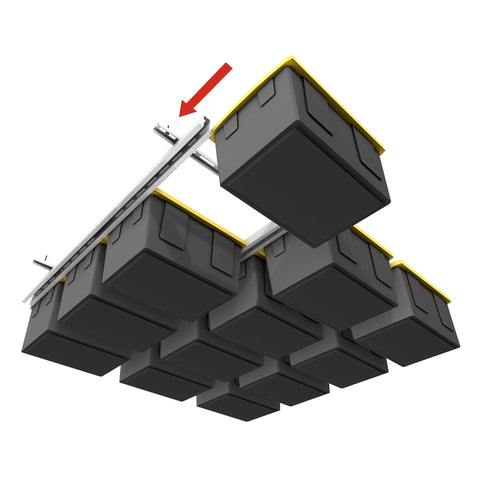
Retractable ceiling racks — also called storage lifts or storage elevators — solve the access problem entirely by bringing the rack down to you. The platform lowers to a comfortable working height, you load or unload what you need, then raise it back to the ceiling. No ladder, no reaching overhead, no awkward balancing acts with heavy bins.
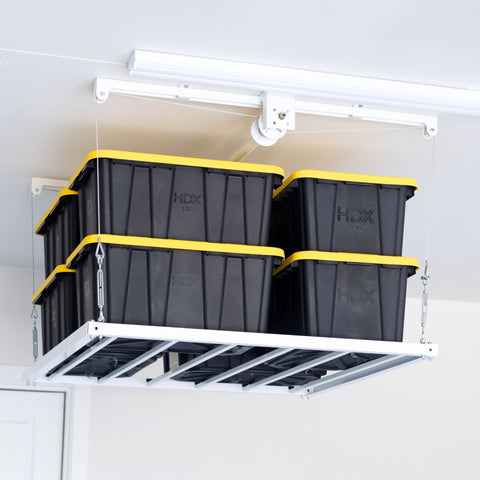
Ceiling SAM's retractable systems include the 4x4, 4x6, and 4x8 Retractable Garage Storage Lifts, all drill-powered with an 8-foot drop and 400 lb capacity. For maximum capacity and convenience, the 4x8 Storage Elevator Pro is fully motorized, handles up to 700 lbs, and accommodates ceilings up to 14 feet. The right choice depends on how often you need to access stored items and how much physical effort you want the retrieval process to involve.
All-in-One Systems
For homeowners who want maximum storage density in a single installation, the 3-in-1 Storage System combines a 4x8 heavy-duty ceiling rack with an integrated Tote Slide underneath — giving you both a high-capacity fixed platform on top and sliding bin access below. It's a smart option when you want to make the most of a single ceiling zone without piecing together multiple products.
Hanging Storage in Your Garage: What Belongs Up There?
Part of what makes a ceiling rack system succeed or fail is putting the right items on it. Ceiling storage in a garage isn't a catch-all — it works best for a specific category of items, and mixing in the wrong things makes the whole system less functional.
Ceiling racks are well-suited for:
Seasonal decorations: Holiday bins, wrapping supplies, artificial trees. These are the quintessential ceiling storage items — large, used once or twice a year, and perfect candidates for being completely out of the way the rest of the time.
Off-season sports gear: Ski equipment in summer, beach gear in winter, camping supplies between trips. Grouping by season makes rotation easy — when summer ends, one zone of the rack becomes winter gear.
Luggage and travel gear: Suitcases, duffel bags, and travel accessories are bulky but infrequently used. Ceiling storage keeps them accessible for trips without occupying prime floor or wall space year-round.
Oversize or awkward items: Rooftop cargo boxes, foam pool floats, sleeping bags, and other items that don't stack well or fit neatly on shelves do surprisingly well on an open ceiling rack platform.
Backup supplies and bulk goods: Spare paper towels, bottled water cases, and similar bulk purchases can live on ceiling storage racks until needed without cluttering the main living areas of the home.
Items that don't belong on ceiling racks:
Frequently accessed tools and supplies — anything you need daily or weekly is better served by wall storage at eye level
Heavy single items like engine blocks or loaded toolboxes — these tend to concentrate weight in one spot rather than distributing it, which isn't what ceiling racks are designed for
Hazardous materials or anything that could cause harm if it fell — the ceiling isn't the place for paints, solvents, or heavy sharp items
Garage Ceiling Rack Installation: What to Expect
Installing a garage ceiling rack is a manageable DIY project for most homeowners, but it's worth knowing what you're getting into before you start.
Tools you'll need
Stud finder
Drill with appropriate bits for your ceiling material
Level (a long level or a laser level is ideal)
Measuring tape
A helper for holding things in place while you fasten
Time to expect
A single ceiling rack installation — once you've measured, planned, and gathered materials — typically takes 1 to 3 hours for a capable DIYer. More complex setups with multiple racks or sliding accessories will take longer. Don't rush the layout and measuring phase; it's far easier to adjust pencil marks than to fill and re-drill holes.
The sequence that works
Mark your joist locations. Lay out the rack position on the ceiling using a level to ensure it's straight. Drill pilot holes. Fasten mounting hardware into joists using appropriate lag screws. Hang the rack frame. Level and adjust before fully tightening. Then test it with gradually increasing weight before loading it fully.
If your garage has finished drywall on the ceiling rather than exposed joists, the basic process is the same — but locating joists through drywall requires a reliable stud finder and sometimes some trial and error. Mark carefully before drilling.
Maintaining Your Garage Ceiling Storage Rack Over Time
A well-installed ceiling rack should last for many years with minimal maintenance, but a few periodic checks will keep it performing safely.
Check fasteners annually. Seasonal temperature swings cause materials to expand and contract, which can gradually loosen hardware. Inspect all lag screws and mounting bolts once a year and tighten anything that's worked loose.
Inspect for corrosion. Garages can be humid environments. Look for rust or surface corrosion on the rack frame and hardware, particularly in climates with significant seasonal moisture. Address any corrosion early to prevent it from compromising structural integrity.
Don't creep past the weight limit. It's easy to gradually add "just one more bin" until a rack is quietly overloaded. Keep a rough mental tally of what's stored and periodically verify it's within the rated capacity.
Re-check levelness after significant loads. If you've added or rearranged a lot of weight, confirm the rack is still hanging level. An uneven rack puts unequal stress on mounting points over time.
Ceiling Storage Garage: Building the Full System
Most homeowners who install one garage ceiling rack end up wanting more. Once you see how much floor space opens up when seasonal gear moves overhead, the natural next step is to expand the system.
The most effective complete garage ceiling organization setups tend to follow a layered logic: high-traffic items get low, accessible storage (wall shelves, pegboards); medium-frequency items get a retractable lift or a fixed rack with a bin slide system; infrequently accessed items go on fixed platform racks at maximum height. The floor stays clear for vehicles and work.
Ceiling SAM's lineup is built to support this kind of layered approach. The Garage Storage Wall Shelf and Wall Shelf Combo handle the wall layer. Fixed and retractable ceiling racks handle the overhead layer. And sliding bin systems bridge the gap between the two — giving ceiling storage the accessibility of a shelf without consuming any wall space. Together they create a garage that feels genuinely organized rather than just less cluttered.
Final Thoughts
Garage ceiling racks reward the homeowners who approach them with a plan. The ceiling is genuinely the best storage zone in most garages — but only if the rack is well-positioned, properly anchored, thoughtfully loaded, and paired with the right accessories for how you actually use it.
Start by measuring your ceiling height and mapping your obstructions. Pick a rack size that fits the zone you have available. Think about whether a fixed rack, a sliding bin system, or a retractable lift better matches how often you'll access the stored items. Then install it right and enjoy a garage floor that finally stays clear.
Explore Ceiling SAM's complete range of garage ceiling storage racks and retractable storage lifts to find the combination that works for your space.
Questions about your garage? Real people, fast answers.
Call or text(480) 720-0593