
Wall Mounts for Bikes: Room-by-Room Guide to Finding the Right Bike Storage Solution

Storing a bike on the wall sounds straightforward until you're actually standing in your garage — or your apartment, or your mudroom — trying to figure out exactly which wall, at exactly what height, with exactly what kind of hardware. The options are wider than most people expect, the constraints are very real, and the wrong choice means either a bike that's constantly in the way or a mount that goes unused because it's too much hassle to actually put the bike on it.
This guide is built around the spaces where people actually store bikes — garages, apartments, basements, mudrooms, and sheds — because the right wall mount for a bike depends heavily on the specific room you're working with. The wall materials, the available space, the household members who need to access the bike, and what else the space has to do all shape which solution will actually work for you.
We'll cover the wall mounting options for every scenario, what makes each one succeed or fall short, and when it makes sense to look past the walls entirely and think about the ceiling instead.
Why Wall Mounting Beats Floor Storage for Almost Every Household
Before getting into the specifics, it's worth being clear on why a wall hanger for a bicycle is worth the installation effort in the first place.
A bike on the floor takes up roughly 6 square feet of footprint — more when you factor in clearance around it. In a garage that's trying to fit two cars, seasonal gear, and a family's worth of sports equipment, that footprint is expensive. In an apartment where every square foot of floor space doubles as living space, it's even more so.
A wall-mounted bike hanger effectively reduces that footprint to almost zero. The bike occupies wall space that usually wasn't serving any purpose anyway, and the floor beneath it stays completely clear. It also eliminates the chronic problem of bikes tipping over and scratching each other, the car, or the wall — a wall mount bike rack keeps the bike positively in place until you actively lift it off.
The access argument is equally strong. A bike that's stored flat on the floor between other items has to be physically maneuvered out before you can ride it. A bike on a wall mount is immediately grab-and-go — lift it off, roll it out, ride.
Garage Wall Mounts for Bikes: The Most Common Scenario
The garage is where most wall bike hanging happens, and for good reason — garages typically have the most wall space, the most structural framing to anchor into, and the most tolerance for utilitarian hardware. Here's how to think through bike wall storage specifically in a garage context.
Choosing the right wall section
In a standard two-car garage, the most useful locations for wall bike hangers are along the side walls rather than the back wall, and positioned toward the front of the garage near the door. This keeps bikes close to the exit so you can roll them out quickly, and avoids the back of the garage where they'd get buried behind everything else.
Before settling on a wall section, check for stud locations. Garage walls typically have studs every 16 or 24 inches — your wall mount bicycle hardware needs to anchor into these studs, not just drywall. Identify the stud layout in your chosen zone before deciding on final placement.
Horizontal vs. vertical wall mounts in a garage
A horizontal wall hanger for a bike holds the bicycle parallel to the wall — one wheel lifted onto a hook, the frame angling away at roughly 45 degrees. This is the most common setup and works well when you have 2-3 feet of wall width per bike and enough depth clearance for the bike to hang without the rear wheel or handlebars interfering with car doors or foot traffic.
A vertical wall bike hanger holds the front wheel pointing straight up, the bike hanging down close to the wall. It takes up far less horizontal width — less than 12 inches per bike — which makes it the right choice when wall width is limited or when you need to fit multiple bikes in a narrow section. The trade-off is that lifting a bike straight overhead is more physically demanding, especially with heavier bikes.
Spacing multiple bikes correctly
Getting the spacing right on multiple wall bike hangers is where most garage installations go wrong. Handlebars are the culprit — they extend well beyond the frame and will overlap between adjacent bikes if the hooks are spaced too close together.
For horizontal mounts, plan a minimum of 18-20 inches of horizontal spacing between adjacent hooks. If your bikes have particularly wide handlebars — mountain bikes, cruisers, cargo bikes — measure the actual handlebar width and add several inches of clearance beyond that. It's much easier to measure before drilling than to fill holes and start over.
When garage walls run out of room
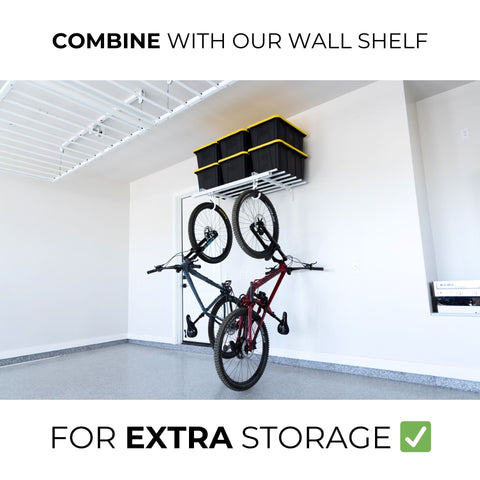
Garages with multiple bikes, limited wall space, or walls already committed to shelving and tool storage often hit a point where there simply isn't enough suitable wall real estate for all the bikes. This is where ceiling storage becomes the practical solution rather than an alternative to consider.
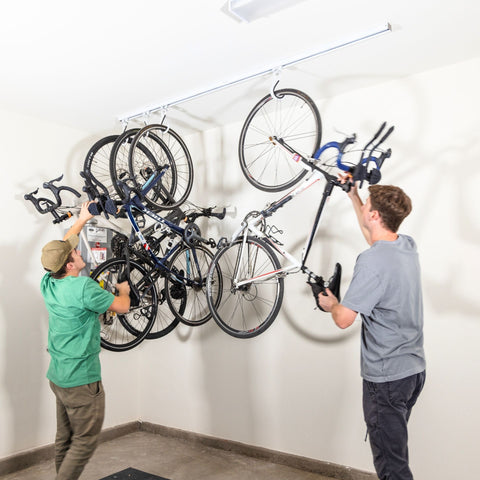
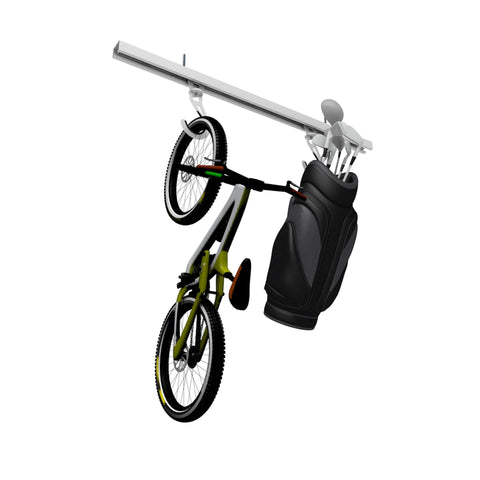
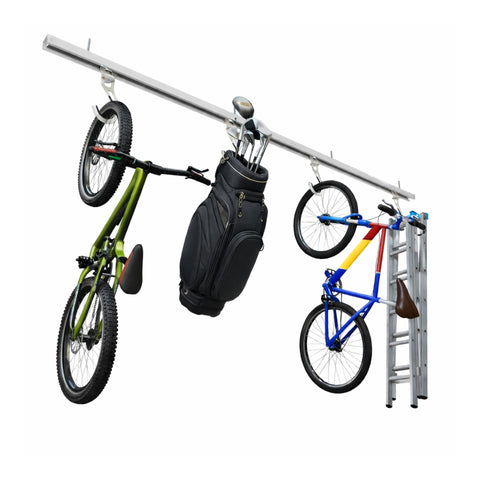
Ceiling SAM's Bike Slide and Bike Slide Pro mount to ceiling joists and store bikes on a sliding overhead track — each bike independently accessible without touching the others. For a family with three, four, or more bikes, this ceiling approach is often the only practical way to store everything without the garage feeling completely taken over by bikes. It frees the walls for shelving, tools, and everything else competing for that space.
Apartment Wall Mounts for Bikes: Different Constraints, Different Solutions
Storing a bike in an apartment presents a fundamentally different set of challenges than a garage. Wall materials may be concrete, plaster, or lightweight drywall without accessible studs. Landlord restrictions may limit what you can mount. Floor space is at an absolute premium. And whatever solution you choose has to coexist with how the space looks and functions as a living environment.
Finding anchor points in apartment walls
The most important first step in an apartment is understanding what's actually in the walls. Older buildings with plaster walls over wood lath have very different anchoring requirements than newer construction with standard drywall over wood studs or metal studs. Concrete or masonry walls require masonry anchors and a hammer drill.
Use a reliable stud finder before committing to any wall mount bike rack location. If you find studs, anchor into them — that's always the strongest option. If you don't, and the wall is standard drywall, heavy-duty toggle bolts rated well above your bike's weight are your best alternative. Avoid basic plastic drywall anchors for anything beyond the lightest bike.
Vertical mounts are particularly valuable in apartments
In an apartment where floor space is genuinely limited and the bike will be near living areas, a vertical wall bicycle hanger is often the best choice. The bike takes up minimal floor projection from the wall — handy when the alternative is a bike leaned against a wall that blocks a doorway or traffic path — and the slim profile looks more intentional than a horizontal bike jutting out at shoulder height into the middle of a room.
The aesthetic factor
In a garage, a utilitarian J-hook is perfectly fine. In a living space, the hardware you mount a bike on matters more — both for how it looks and how it functions day-to-day. A wall hanging for bikes that requires an awkward overhead lift to remove the bike every morning will be abandoned quickly in favor of just leaning it against the wall. Prioritize ease of access and clean hardware finish when choosing a wall mount for an apartment context.
Basement and Utility Room Bike Storage: The Practical Middle Ground
Basements and utility rooms occupy an interesting middle ground between garages and apartments. They typically have more forgiving wall materials than apartment living spaces, more flexibility on aesthetics, and — crucially — often have exposed joists or concrete block walls that change the anchoring equation.
Concrete block and masonry walls
Many basements have concrete block or poured concrete walls, which actually provide excellent anchor points for wall bike hangers — stronger in many ways than wood stud construction — but require the right hardware. Masonry screws (Tapcons) or sleeve anchors driven into solid concrete block with a hammer drill hold extremely well. Standard wood screws in plastic drywall anchors will not work and should not be attempted on masonry.
Exposed joists overhead
Basements with exposed ceiling joists are an opportunity worth noticing. If you have floor joists visible above you, ceiling-mounted bike storage becomes as easy to install here as in a garage — and it may actually be more convenient than wall mounting, since basements often have limited usable wall surface area between windows, utility panels, water heaters, and other fixtures.
Humidity and long-term storage
If a basement bike storage area experiences seasonal humidity, keep bike condition in mind. Hanging a bike on a wall mount cycle stand long-term in a damp basement can lead to rust on unpainted steel components, brake cable corrosion, and bearing issues. Either address basement humidity with a dehumidifier or plan to mount bikes in the drier zones of the space — typically upper wall areas away from the floor where moisture tends to be highest.
Mudroom and Entryway Bike Storage: Prioritizing Grab-and-Go Access
Storing a bike in a mudroom or near a home entry is a different problem than storing it in a garage or basement — the priority here is daily access speed and minimal footprint in a space that's already doing a lot of functional work.
A wall mount bike in a mudroom needs to come down and go back up quickly and easily, every single day. This shifts the evaluation criteria significantly compared to a garage setup where you might access the bike a few times per week. Ease of hang and retrieval becomes the top priority, above all else.
Horizontal frame cradle mounts or swing-arm mounts work particularly well here — the bike can be lifted on and off without a precise overhead reach, and swing-arm designs that fold flush when the bike is out minimize the visual and physical presence of the mount in a space that serves multiple daily functions.
Height is also worth thinking through carefully in a mudroom context. A wall bicycle hanger positioned at shoulder height means the bike's footprint — handlebars, pedals, rear wheel — projects into the space at the level where people are moving through most actively. Mounting higher so the bike hangs with the wheels above head height, if wall space allows, can eliminate a lot of daily obstacles.
Wall Mount Bike Rack for Multiple Bikes: A Configuration Guide
Single-bike storage is relatively simple. Multi-bike wall storage requires more deliberate planning — both for space efficiency and for making sure every bike remains individually accessible without moving others.
The stagger approach
Mounting alternating bikes at different heights — one hook slightly higher, the next slightly lower, alternating along the wall — allows handlebars and pedals from adjacent bikes to interleave rather than collide. This is the most space-efficient way to fit multiple horizontal wall bike hangers on a limited run of wall, and it typically lets you fit bikes about 15-16 inches apart rather than the 18-20 inches required for same-height mounts.
Mixing bike types
Households with a mix of bike sizes — adult road bikes, a kid's 20-inch, a fat-tire mountain bike — need to think about which bike goes where. The wider or heavier bikes should go at the easiest-to-reach positions. Kids' bikes should be mounted low enough for kids to actually reach them independently. If a child can't remove their own bike from the wall mount bike rack without help, the system creates extra work rather than eliminating it.
When four or more bikes tip the math toward ceiling storage
Four bikes on wall hangers requires roughly 6-7 feet of horizontal wall space at minimum — more with larger bikes. In most garages, that's a significant portion of one wall, and it eliminates that wall for any other storage purpose. At this scale, the ceiling starts looking like the smarter answer.

A ceiling sliding system like the Ceiling SAM Bike Slide Pro stores multiple bikes in a linear overhead track that takes up no wall space at all. Each bike slides along independently, so there's no need to move one to reach another — a significant practical advantage over wall bike hangers once you get beyond two or three bikes. The floor and walls stay completely free for everything else the garage needs to do.
Wall Mounting Bike Rack Installation: The Non-Negotiables
Regardless of which wall mounting system you choose or which room you're installing it in, a few principles apply universally.
Always anchor to structure
A wall hanger for a bicycle holding 20-40+ lbs needs to be anchored to structural framing — wood studs, masonry, or metal studs with appropriate hardware — not to drywall alone. Drywall can support surprisingly little sustained load, especially with the leverage created by a bike hanging out from the wall. Pull-out failures on drywall-only installs are common and can happen without warning. Every wall mount bicycle installation should start with confirming where the structural anchor points are.
Match hardware to wall type
Wood studs, metal studs, concrete block, poured concrete, brick, and plaster-over-lath all have different hardware requirements. Using the wrong fastener for the wall type is one of the most common installation mistakes. When in doubt, consult the mount's installation documentation and use the hardware type it specifies for your wall material — or step up to a stronger option if you're uncertain about the load.
Test before trusting
After installation, load test the mount before hanging a bike on it. Grip the mount and apply firm downward and outward pressure — replicating the direction a loaded bike creates. There should be zero movement. Any flex, creaking, or give means the anchor isn't solid. Address it before the bike goes on.
Check clearances before you drill
Map out exactly where the bike will sit when hung — at its full width including handlebars and pedals, and its full depth projection from the wall. Make sure there's nothing in that envelope: car doors, other bikes, shelving, wall switches, outlets. It takes five minutes to check before drilling and a lot longer to fix after the fact.
Finding the Right Solution for Your Space
Wall mounts for bikes work brilliantly when the right type of mount meets the right wall in the right room. The horizontal wall hanger, the vertical bicycle mount, the frame cradle, the folding swing-arm — each has its ideal context, and matching the mount to the specific constraints of your space is what separates a solution you'll use every day from one that becomes an obstacle.
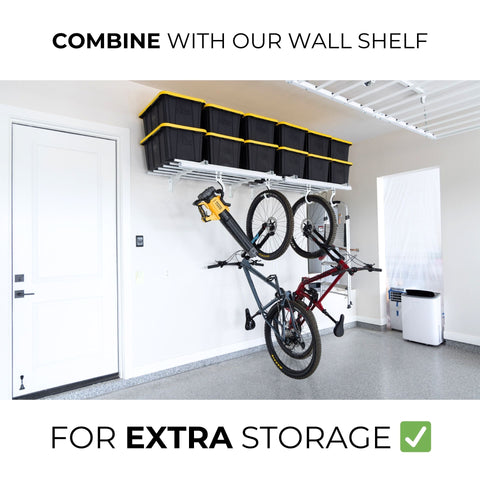
For single or double-bike households with accessible wall space, a well-chosen wall mount bicycle rack is all you need. For households with more bikes than wall space — or garages where the walls are already doing a lot of work — a ceiling-mounted sliding system offers a cleaner, more scalable answer that keeps every square foot of wall available for other uses.
Explore Ceiling SAM's bicycle storage systems — including the Bike Slide and Bike Slide Pro — to see how ceiling storage compares to wall mounting for your household. And if you're building out a complete garage organization system, the full range of ceiling storage racks and wall storage solutions are designed to work together as a complete, cohesive system.
Questions about your garage? Real people, fast answers.
Call or text(480) 720-0593